Using Poseidon
Creating Poseidons
Creating a new Poseidon is easy – simply add the Poseidon script to the object with the Mesh Filter you are targeting. Our recommendation is that Poseidons should really only be added in Prefab mode, as it makes things cleaner, if you’re going to prefab an object later. Poseidon does not run in Prefab Mode at the moment.
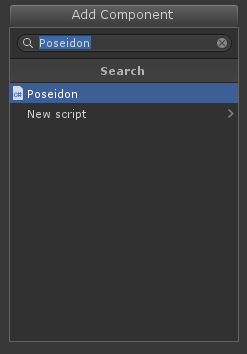 Click and add. It’s that easy.
NOTE: Poseidon works with closed, interior facing geometry. (Closed only matters as long as all the bottoms are closed. Sides and tops can be open, but this may have unexpected consequences.). If you are adding to an exterior facing Mesh, you can utilize the Flip All Faces parameter to flip all polygons in your Base Mesh.
Auto Importer
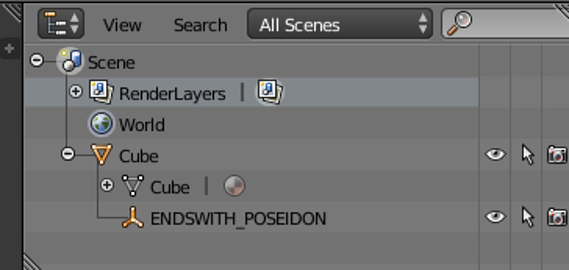
The other, recommended way of working with Poseidon is to use the Poseidon Auto ModelImporter. Simply create a Mesh in your 3D modeler of choice, and if a portion of it is to be the Poseidon carver, simply place an empty object ending with _POSEIDON, and our importer will convert it automatically!
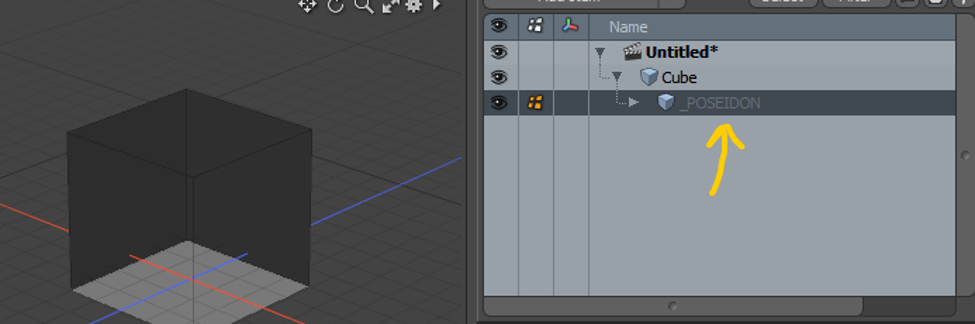
If your mesh in your 3D Modeler of choice has an empty child ending with _POSEIDON, it will automatically be imported as a Poseidon in the Mesh Prefab generated by Unity.
In general, we recommend using the auto-importer for almost everything when making new Poseidons. It’s much easier to manage models in your own 3D modeler. Our algorithm detects if you’ve updated a mesh in the modeler and saved over the old mesh*.
- Kind of. We just look at the number of vertices and submeshes. If you take a Poseidon mesh, and just move a vert, we won’t recognize it as changed and requiring a recompute. A more robust solution is on our roadmap as this is something that we want fixed soon for our own purposes.
Workflow
Once an object with an inward-facing Mesh has been marked as a Poseidon, it is simple to use it. Simply move it around in the scene and intersect it with other Poseidons in the scene, and watch the magic happen. Now, while that workflow might seem easy, there is a cost to doing high volume computations like this.
When you’re in a scene with hundreds of potential intersecting objects, the math can become complicated and super slow. Thus, you may want to adjust something many times before letting it carve into place. We’ve exposed a button that shows up on bottom right side of the scene view that lets users PAUSE Poseidon. When paused, Poseidons will not recompute themselves under any circumstances. This allows a user to move multiple objects, positioning them just where they want, and finally unpause to let Poseidon recompute the recent changes.
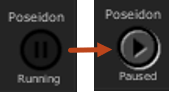
We’ve found that when working in extremely large scenes, we’re constantly toggling between PAUSED and RUNNING in order to get the perfect set of tweaks. This overlay can be turned off in the Poseidon Preferences window.
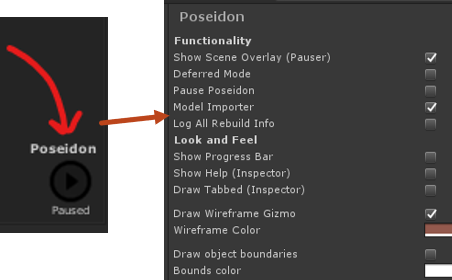
Clicking on the word Poseidon in the Scene View overlay can pull up the preferences window where you can tweak Poseidon specific settings, or this can be invoked from a Poseidon Inspector itself. Many global settings can be adjusted here.
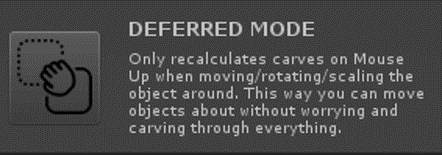
Deferred Mode is another addition we’ve added in place to help speed things up. When using Poseidon, it is nice to see things carving in realtime – but it is not nice if that “realtime” aspect takes forever to actually compute. Deferred Mode uses the “Mouse Up” property to decide if it should be recomputing Poseidons or not. This is in order to help with transform changes (moving/scaling/rotating) so that it’s only once you let go of the mouse that we actually recalculate the Poseidons. We strongly suggest leaving this on most of the time, unless you really want to see everything carving in realtime.
UV Properties
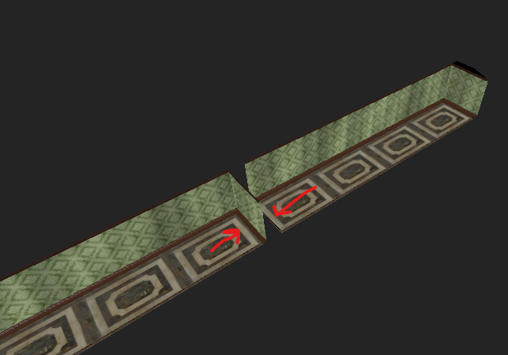
When you’re dealing with properly textured objects, and pushing them together, it is really easy for seams to occur. As can be seen in the example below, the wallpaper and the marble floor produce ugly seams when pushed together.
If your goal is to eliminate generated seams, one possible solution is to use our UV remapper that can be found on the Poseidon inspector.
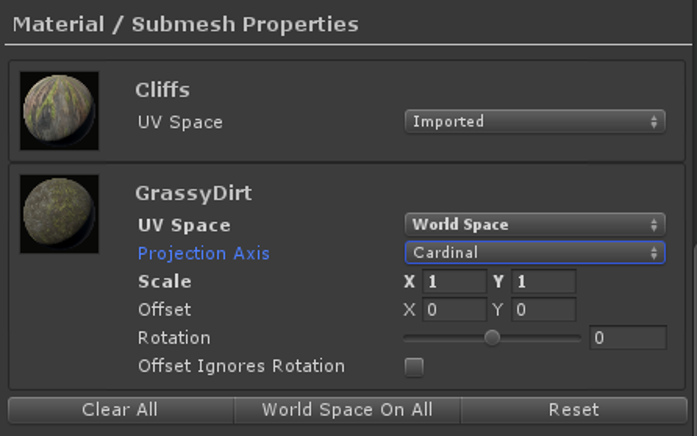
The Material / Submesh Properties generates UV overrides for each material/submesh in your mesh. When recomputing Poseidons, we can either use Imported UVs (the ones you created in your modeler), or World Space UVs, which will allow us to remap a specific submesh’s UVs to a very basic projection axis. It’s nothing too fancy, but it allows us to tile based on where something is in the world, not based on how it was UV mapped in the modeler.
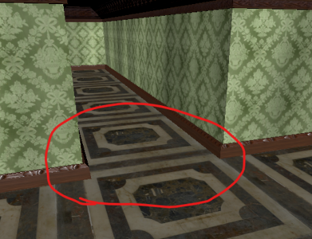
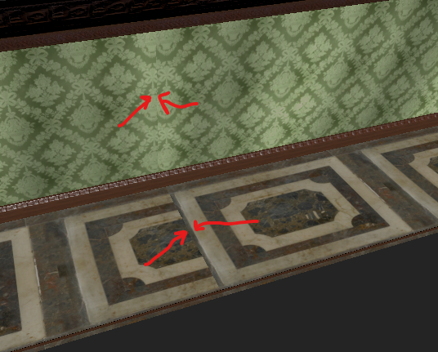
In the image to the above, the floor tiles were remapped with World Space UVs, so that no seam occurs when these two rooms are connected together.
Because we’ve found using World Space UVs so useful, we’ve adopted the habit of almost always using it for ground textures and sometimes for walls, depending on the complexity of the model. This means that even if the floors/walls/roof of a room all use the same material, sometimes, we may want to explicitly place them on separate submeshes in order to get custom tiling on the generated World Space UVs.
The Scale property allows you to scale a World Space Texture, to make it larger or smaller on the UVs. Rotation rotates generated UVs by a certain amount in degrees, and Offset allows you to shift the UVs by a certain amount in order to get things to line up right. Offset Ignores Rotation is just a property that allows you to shift the UVs before doing rotation. Otherwise, rotation is calculated first by default.
Honestly, in many years of using Poseidon, our team has mostly only ever used the Scale property on these, but we wanted to expose everything, just in case your specific use cases need Offset and Rotation.
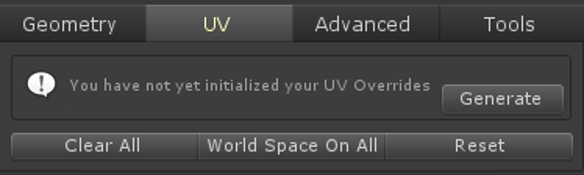
In order to start using these settings, you have to “Generate” the UV Overrides. This is just an annoying artifact of how we need to serialize the UV override data in the object, since meshes can change on us. If there are no overrides, then the system will use Imported UVs.
The buttons on the bottom do simple things. Clear All just clears the Overrides and everything is back to being Imported. World Space On All makes sure all of the UV Space properties are set to World Space. It’s a fancy shortcut for making everything World Space. Reset does the opposite and sets everything to being Imported UVs. This whole thing will probably be cleaned up and simplified in future releases.
Additional Features
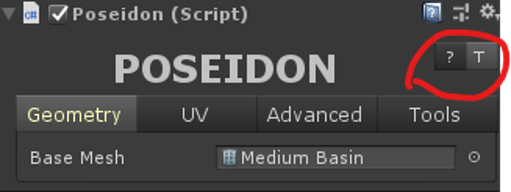
The Poseidon Inspector has a question mark button which will toggle a bunch of help text above most options on the inspector. The “T” button will toggle between a tabbed mode, and a list-mode for the categories in the inspector.
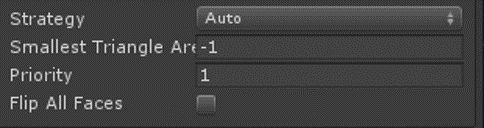
Under advanced, we recommend reading the help text listed in the inspector, but think that most people shouldn’t really be messing around with these properties, except maybe Priority. Flip All Faces can allow you to flip all the normal of a given mesh, but depending on the mesh, it may have unexpected results. We don’t really recommend using it, but it’s there if you really need to flip the default Cube.
The Poseidon inspector offers a number of warning boxes when things aren’t correct. We strongly suggest resolving those using the “Fix Now” buttons. These include things like, changing Box Colliders to Mesh Colliders, or if your UV overrides were generated at some point in the past, and the Mesh has a different number of materials now, etc. Please pay attention to these in order for your Poseidons to work correctly.
